
Last verified: September 29, 2026
How to Put on a Dog Harness: First Identify What Kind You Have
Quick answer: there are two separate questions people often mix together. How the harness goes on may be step-in, over-the-head, neck-buckle or multi-strap. Where the leash attaches may be front-clip, back-clip or dual-clip. A front-clip harness is not automatically a step-in harness, and a back-clip harness is not automatically an overhead harness.
Once you identify the construction, put it on loosely, orient the chest and back correctly, close every buckle, then adjust the harness while your dog is standing. The finished fit should be snug without pinching, should not rub directly behind the elbows, should not ride onto the throat, should allow comfortable front-leg movement, and should resist a gentle backward “escape” test. The familiar two-finger rule is only a quick fit check; it is not a universal sizing formula and does not replace the manufacturer’s measurements or a movement test.
Patify’s 7-check harness test: orientation → buckle → neck → chest/girth → elbows/shoulders → movement → escape. If all seven pass, you have done more than simply “get the harness on”—you have checked whether it can be used safely for that dog.
Harness Decoder: Do Not Confuse “How It Goes On” With “Where the Leash Clips”
This is the easiest way to stop getting lost in harness instructions.
| Question | Common options | What it changes |
|---|---|---|
| How does it go on? | Over-the-head, step-in, neck-buckle, multi-strap | The sequence for dressing the dog |
| Where does the leash attach? | Back, chest/front, or both | Where leash force is applied |
| How many body straps? | One girth strap, double-H, three-strap/escape-resistant | Security and adjustment range |
| What shape is the front? | Y/H-style, chest band, padded vest or other design | How the harness contacts the sternum/shoulder region |
For example, you can own an over-the-head dual-clip harness: it goes over the dog’s head, but has both a chest leash ring and a back leash ring. You can also own a step-in back-clip harness: the dog steps into two openings and the leash attaches over the back.
Find these five landmarks before you start
- Leash ring(s): metal or reinforced attachment point.
- Neck opening: the opening that sits around the base of the neck/upper chest.
- Chest piece or sternum strap: the part intended to sit on the front of the chest.
- Girth/belly strap: the band that wraps around the rib cage behind the front legs.
- Buckles: note which side each closes on before the dog is involved.
If the harness has a sewn label, logo or product instructions, use them. Manufacturer construction varies. The correct orientation for one harness should not be guessed from another brand’s photo.
How to Put on an Over-the-Head Dog Harness
AKC and Kurgo both describe the same basic logic for common overhead harnesses: loosen first, pass the neck opening over the head, position the chest section correctly, route the lower strap(s) between or behind the front legs as designed, buckle around the rib cage, then adjust.
- Loosen the straps before the first fitting. Do not force a tight neck opening over your dog’s ears and face.
- Orient the harness. On a typical back-clip model, the back panel and back D-ring should finish on top of the dog. The chest/sternum section should face down and forward.
- Guide the neck opening over the head. Let the dog move toward it rather than pulling the harness forcefully onto the face.
- Position the chest section. On designs with a strap between the front legs, it should run centrally along the chest rather than twisting toward one armpit.
- Bring the girth strap around the rib cage. It should close behind the front legs according to the product design, not around the soft abdomen behind the rib cage.
- Fasten all buckles. Listen/feel for a complete click and check that fur is not trapped in the buckle.
- Center the harness. The back panel should not be rotated far to one side before you even attach the leash.
- Adjust gradually. Alternate sides rather than pulling one strap extremely short and leaving the opposite side loose.
- Run the full fit check before walking.
Common error: owners sometimes rotate the harness 180 degrees because the leash ring “looks like it should be in front.” Front-clip harnesses do have a chest attachment point, but that does not mean the padded back panel belongs underneath the dog. Use the harness’s actual construction and product instructions.
How to Put on a Step-In Dog Harness
A classic step-in harness lies on the floor as two leg openings. AKC describes these openings as two triangular spaces. The front feet step into them, then the two sides lift around the chest and buckle on the dog’s back.
- Lay the harness flat. Untwist every strap before bringing the dog over it.
- Locate the left and right leg openings. The joining section normally points forward toward the chest.
- Place one front paw into each opening. Do not put both paws through the same loop.
- Lift both sides of the harness up along the rib cage.
- Close the buckle(s) over the back.
- Check that the center strap is not twisted.
- Adjust the chest/girth fit while the dog is standing.
- Perform the backward escape test before attaching the leash outdoors.
Step-in designs can be useful for dogs that dislike equipment passing over the head, but they still require cooperative paw handling. If your dog panics when you lift a foot, an adjustable harness that buckles at the neck may be easier than repeatedly wrestling the paws into place.
Neck-Buckle and Multi-Strap Harnesses
Neck-buckle harness
Some Y/H-style harnesses open at the neck as well as the girth. You can wrap the neck section around the dog instead of sliding it over the head, then fasten the chest/girth strap. This can be especially useful for dogs that are sensitive around the ears, head or neck.
Three-strap or escape-resistant harness
Some harnesses add a second body strap farther back around the torso. Dogs Trust specifically recommends considering a three-strap harness for dogs that are good at wriggling free. The extra strap is not an excuse for a loose fit; its job is to make backward escape more difficult when appropriately sized.
For narrow-headed, deep-chested or fearful dogs with a history of backing out, consider a safety backup between the harness and a collar, or a double-ended lead where appropriate. Dogs Trust also recommends a backup connection for dogs or puppies that may slip equipment.
The 7-Point Harness Fit Check
Do this indoors or in a secure enclosed area before the first real walk.
1. Orientation
Nothing is twisted. The chest section is on the chest, the back section is on the back, and leash rings sit where the manufacturer intended.
2. Buckles
Every buckle is completely closed, undamaged and free of trapped skin or fur. Tug each connection lightly by hand.
3. Neck/throat
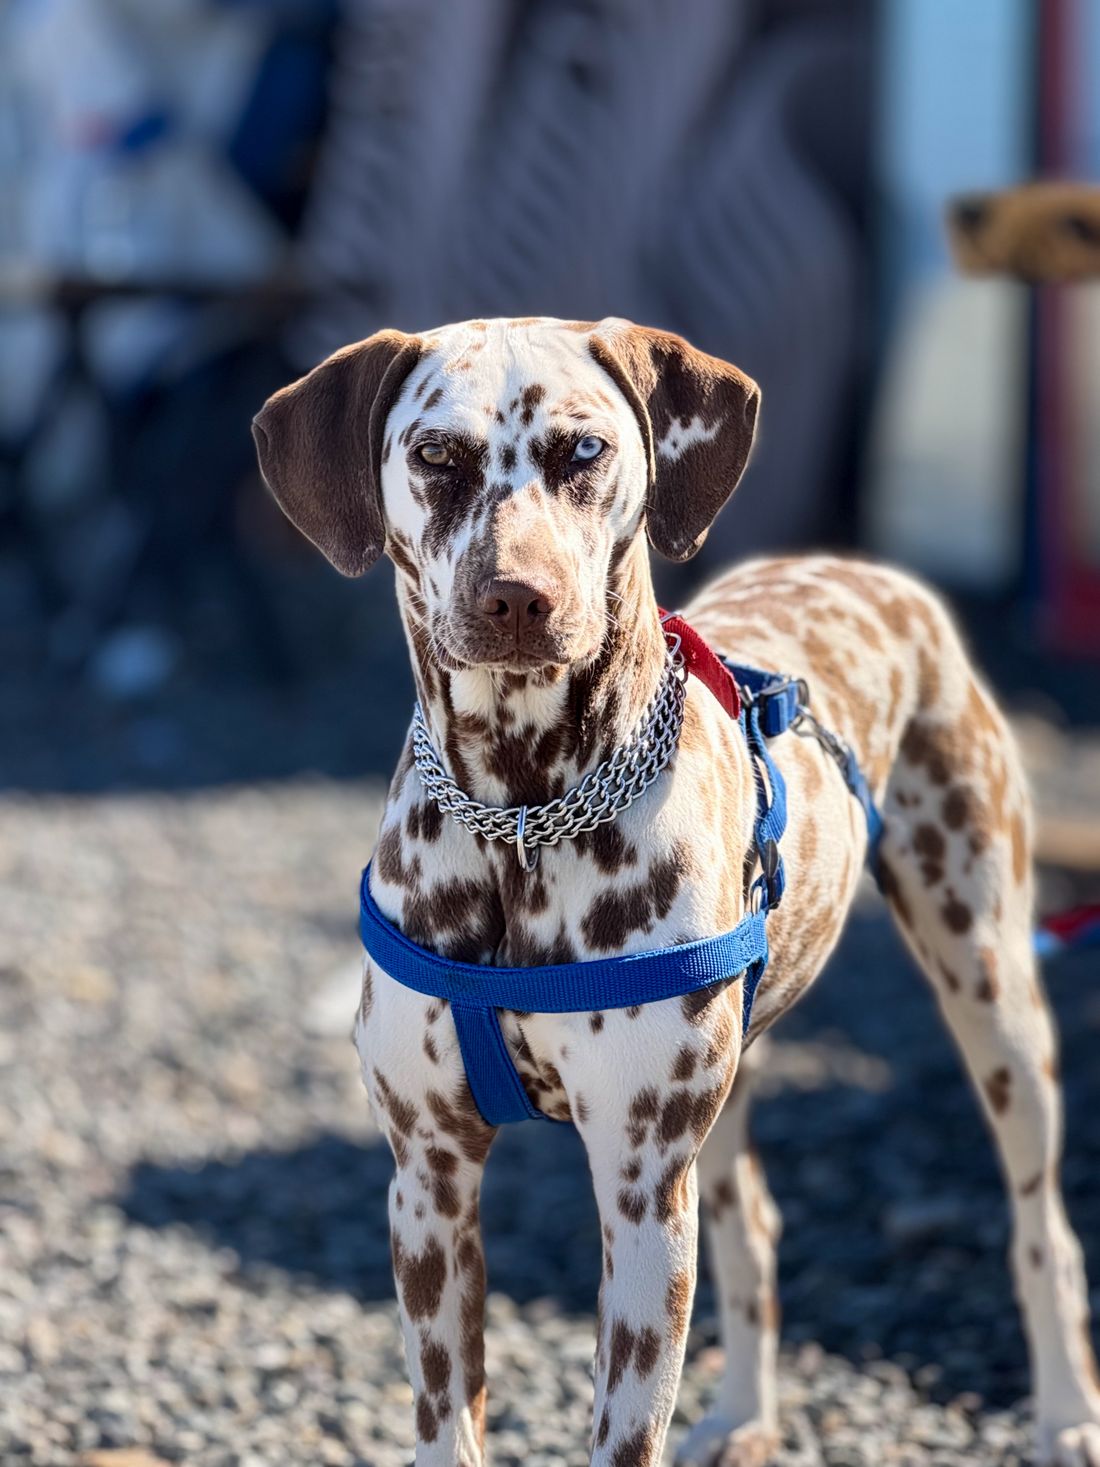
The harness should sit around the base of the neck/upper chest according to its design—not migrate high onto the throat when leash pressure is applied. AKC fitting guidance recommends measuring at the base of the neck where it meets the shoulders.
4. Chest/girth
The body strap should sit around the rib cage. AKC fitting guidance warns against a girth strap sitting behind the rib cage toward the soft abdomen. VCA likewise emphasizes that a body harness should be fitted without rubbing behind the elbows.
5. Elbow and shoulder clearance
Move each front leg gently through a normal comfortable range and then watch the dog walk. A strap should not saw into the back of the elbow or visibly pin the front leg against the body.
6. Movement
Walk several straight lines and turns. Watch for shortened steps, hopping, repeated scratching at the harness, freezing, unusual head carriage or strong resistance that begins only after the harness is fitted.
7. Escape security
Apply gentle backward pressure as if the dog were backing away from you. The neck opening should not slide over the head. Do not yank the dog or simulate a panic event; you are checking geometry, not stress-testing the equipment.
The Two-Finger Rule: Useful Check, Not a Universal Sizing Law
“You should fit two fingers under the harness” appears in many guides. It is useful—but often presented too rigidly.
AKC has published both a general two-finger guideline and more nuanced veterinary fitting advice noting that a harness should be snug enough that two fingers require some compression rather than sliding easily underneath. Dogs Trust uses an even more conservative “one finger comfortably” description in its harness-training guidance. Product manufacturers may specify their own check.
Those differences tell you something important: finger count is a heuristic, not a standardized engineering measurement.
| Check | Pass | Fail |
|---|---|---|
| Finger space | Snug but comfortable according to product instructions | Strap digs into skin or fingers slide under with large excess space |
| Rotation | Harness stays mostly centered | Back panel rolls substantially to the side |
| Back-out | Neck/body geometry blocks escape | Harness can pass over the head when the dog reverses |
| Elbows | No rubbing during normal stride | Strap repeatedly catches behind elbow |
| Breathing | Dog breathes and pants normally | Visible compression or discomfort |
A fluffy dog adds another complication: fingers may be sitting in coat rather than measuring real strap-to-body looseness. Recheck fit after a major haircut. AKC specifically recommends reassessing a harness after grooming and after weight gain or loss.
Shoulder Movement: What Current Harness Research Actually Shows
A common internet rule says every Y-shaped harness is “non-restrictive” and every chest-band harness is “restrictive.” The evidence is not that simple.
Veterinary and welfare guidance still gives a sensible practical goal: choose a harness that does not visibly press across the front of the shoulder or interfere with comfortable forelimb movement. VCA recommends well-fitted H- or Y-style body harnesses and warns that some designs sitting directly over the shoulder joints can restrict movement.
But experimental research cautions against turning that design preference into an absolute biological claim. A 2019 Royal Veterinary College study of nine dogs found that both harnesses tested altered shoulder extension compared with no harness; unexpectedly, the harness labelled “non-restrictive” reduced extension more in that small experiment. A 2023 study of 66 dogs found significant changes in several gait measures across three commercial harnesses, with effects varying by breed/breed type. A 2026 review of dog-worn equipment concluded that current harness-gait studies consistently find some biomechanical changes, but the magnitude and direction vary and no simple universal winner has emerged.
Practical takeaway: prefer a design that fits the individual dog, does not rub or visibly block the shoulder, remains stable, and passes an actual walking test. Do not assume a marketing label such as “ergonomic,” “no-pull” or “non-restrictive” proves the fit.
If your dog suddenly shortens a stride, limps or resists walking after a new harness—even after careful adjustment—stop treating that as a training problem until fit and physical discomfort have been considered. Patify’s dog limping guide explains why a dog does not need to cry for gait change to matter.
How to Test Whether Your Dog Can Back Out of the Harness
Escape happens when a dog reverses while the leash or handler pulls forward. The harness then travels toward the shoulders and head. A fit that feels secure when the dog pulls forward can fail in the opposite direction.
- Stand in a secure indoor room.
- Attach the leash normally.
- Keep the leash short enough to control slack but do not create a hard pull.
- Encourage the dog to take one or two steps backward, or gently move the harness forward toward the shoulders by hand.
- Watch the neck opening and front legs.
- If the harness can migrate over the shoulders/head, stop and readjust or change size/model.
AKC explicitly recommends trying to pull the harness in different directions and checking whether backward motion creates enough room for the harness to pass over the head. For true escape artists, Dogs Trust suggests extra-body-strap designs and backup connections.
Recheck escape fit after:
- a haircut or coat blowout;
- significant weight gain/loss;
- puppy growth;
- changing seasonal clothing under the harness;
- strap slippage over time;
- the dog chewing or damaging hardware.
10 Signs the Dog Harness Is on Wrong or Fits Poorly
| What you see | Likely problem | First check |
|---|---|---|
| Harness rotates to one side | Too loose, asymmetrically adjusted or wrong shape | Center it and compare left/right strap length |
| Strap rubs armpit/elbow | Girth too far forward or poor body-shape match | Check strap position and size |
| Chest piece rides onto throat | Wrong orientation/adjustment or design mismatch | Reset neck and girth geometry |
| Dog can reverse out | Too loose or insufficient security for body shape | Resize; consider extra strap/backup |
| Hair loss/chafing | Movement/rubbing, poor fit or damaged material | Stop repeated friction and refit |
| Back panel rolls dramatically | Loose/asymmetric fit | Readjust evenly |
| Dog suddenly freezes | Fear, fit discomfort or pain | Remove and assess before forcing walk |
| Front stride becomes visibly shorter | Potential movement interference or discomfort | Recheck shoulder/elbow clearance |
| Buckle sits directly in armpit | Poor strap placement | Reposition or change design |
| Dog repeatedly scratches harness | Irritation, pressure or unfamiliar sensation | Inspect skin and fit |
Kurgo lists chafing, hair loss, side-to-side rotation, escape and strong resistance to walking among signs of a poor fit. If adjusting cannot fix the geometry, the correct answer may be a different model—not tightening the same harness indefinitely.
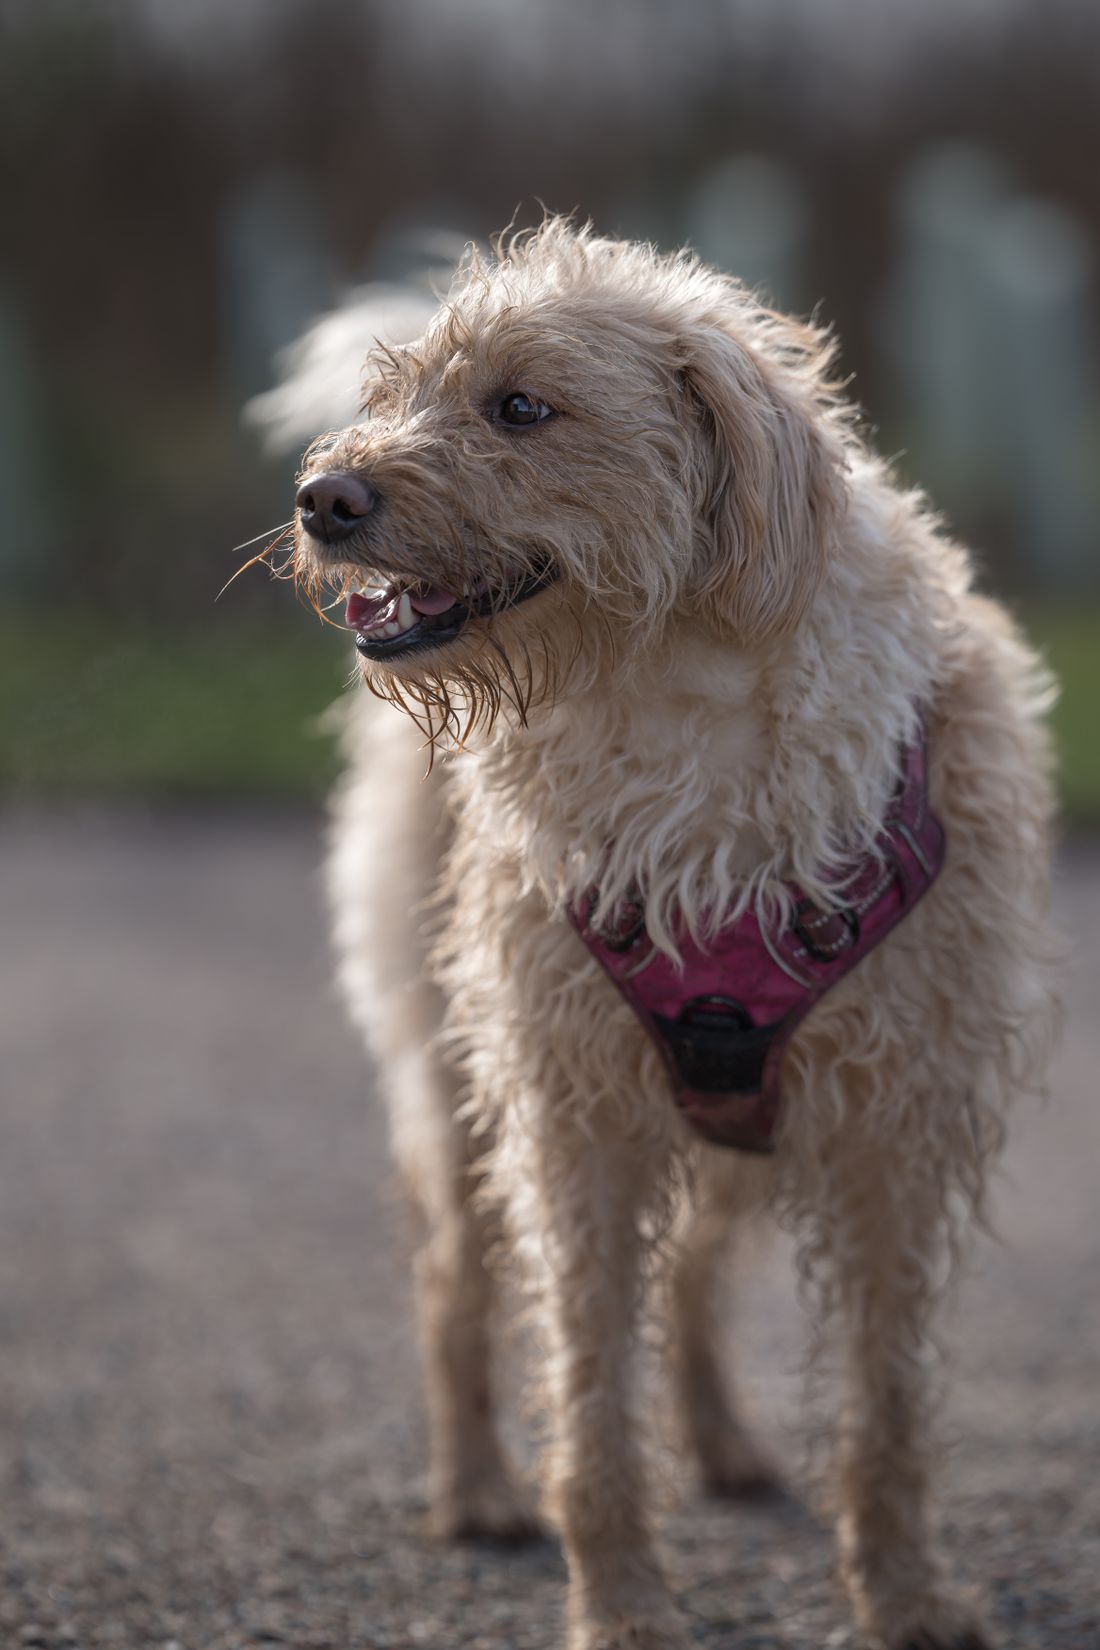
If Your Dog Hates Putting the Harness On
Do not solve harness avoidance by moving faster and holding the dog tighter. Dogs Trust recommends gradual, reward-based introduction: allow the dog to investigate the harness, pair it with food, and teach the head-hole or body contact in small steps.
For a dog that avoids the head opening
- Place the harness on the floor and reward voluntary investigation.
- Hold the neck opening wide.
- Feed a treat through the opening without immediately putting it over the head.
- Progress to the dog voluntarily putting the nose through.
- Only then move the loop behind the ears.
- Practice buckling separately if the buckle sound causes concern.
A neck-buckle or step-in design may be easier for a dog who dislikes equipment passing over the ears. But sudden new avoidance can also reflect ear, neck, shoulder or skin pain. If a dog who previously loved walks suddenly hides when the harness appears, consider more than “stubbornness.” Patify’s leash and harness avoidance guide covers pain, fear and gradual desensitization.
How to Measure a Dog for a Harness
Do not buy by breed name alone. A “medium Beagle” or “large Labrador” label is not a reliable body measurement.
Chest/girth
With the dog standing naturally, measure around the widest part of the rib cage, usually behind the front legs. AKC describes chest girth as the key measurement for most harnesses.
Base of neck
Measure around the base of the neck where it transitions into the shoulders/chest rather than high up under the jaw, unless that specific manufacturer instructs otherwise.
Then use the brand’s own chart
Harness size labels are not standardized. A medium in one model can overlap with a large in another. Check whether the brand bases its chart on dog body measurements or the physical harness dimensions.
If between sizes
Choose the option that gives enough adjustment range to fit the actual dog. Kurgo recommends moving up when a dog fits both overlapping neck and chest ranges for its models, but that is a manufacturer-specific recommendation—not a universal rule for every harness brand.
Front Clip vs Back Clip: This Does Not Change the Dressing Sequence by Itself
Back clip: the leash attaches over the back. This can be straightforward for dogs already walking comfortably on leash.
Front clip: the leash attaches at the chest. VCA notes that gentle pressure from a front connection can help redirect the dog, but also warns that some front designs may sit across the shoulder region and must be fitted carefully.
Dual clip: front and back rings are both available. Some handlers use a double-ended leash for additional control, especially during training.
The key point for this article: look at the buckles and openings to learn how the harness goes on; look at the rings to learn where the leash attaches. Those are related but different questions.
Frequently Asked Questions About Putting on a Dog Harness
How do I know which side of a dog harness is the front?
Find the chest/sternum section, neck opening, girth strap, product label and leash ring locations. On many overhead back-clip harnesses, the main D-ring sits on the back and the narrower chest piece runs between the front legs. Because models differ, verify with the manufacturer’s diagram rather than relying on one universal orientation trick.
How do you put on a step-in dog harness?
Lay it flat, identify the two leg openings, place one front paw in each opening, lift the two sides around the rib cage, buckle them over the back, then adjust and perform a backward escape check.
How do you put on an over-the-head dog harness?
Loosen it, guide the neck opening over the head, position the chest section correctly, route the girth strap behind the front legs as designed, close every buckle, center the harness, adjust it and check movement and escape security.
How tight should a dog harness be?
Snug enough not to rotate or slide over the head, but not so tight that it pinches, restricts comfortable breathing or rubs. The two-finger rule is a common rough check, but manufacturer instructions, body shape, coat thickness, movement and the back-out test matter too.
Is the two-finger rule always correct?
No. It is a heuristic. AKC, Dogs Trust and different manufacturers describe slightly different finger checks. Treat it as one part of the fit assessment rather than a universal measurement standard.
Where should the belly strap sit?
It should wrap the rib cage according to the harness design. It should not sit so far forward that it rubs the elbows, or so far back that it lies around the soft abdomen beyond the rib cage.
Should a dog harness touch the shoulders?
Harnesses necessarily contact the body, but the fit should not visibly block comfortable forelimb movement or create rubbing over the shoulder/elbow region. Research shows harness design effects on gait are more complex than a simple “Y-shape good, chest strap bad” rule, so evaluate the individual dog in motion.
Why does my dog’s harness twist to one side?
Common causes include loose straps, uneven adjustment, leash pressure from one attachment point, or a harness shape that does not match the dog’s chest. If symmetric adjustment does not stabilize it, try another size or model.
Can a dog back out of a harness?
Yes. AKC and VCA both warn that poorly fitted harnesses can be escaped by backing up. Test gently in a secure place. Dogs with an escape history may need a three-strap harness or a backup connection to a collar.
Is a front-clip harness the same as a step-in harness?
No. “Front clip” describes where the leash attaches. “Step-in” describes how the harness is put on. A harness can be step-in and back-clip, overhead and front-clip, or dual-clip in several constructions.
Should my dog wear the harness all day?
For ordinary walking harnesses, VCA recommends removing them when the dog is not directly supervised because of entanglement and rubbing risk. Product-specific medical or working harnesses may have different instructions.
Why does my dog freeze when I put the harness on?
The dog may be uncertain about the equipment, uncomfortable with the fitting process, experiencing rubbing/pressure, or dealing with pain. Remove the harness, check fit and skin, and reintroduce it gradually rather than dragging the dog into a walk.
Sources Checked for This Guide
- American Kennel Club — How to Put on a Dog Harness: overhead, step-in and front-clip fitting sequences.
- American Kennel Club — Choosing the Right Dog Harness: measurements, snug fit, movement and escape checks.
- American Kennel Club — Importance of a Well-Fitting Harness: elbow/girth placement and shoulder movement considerations.
- VCA Animal Hospitals — Collar and Harness Options: body-harness fit, escape, shoulder and supervision guidance.
- VCA Animal Hospitals — Controlling Pulling: H/Y-style fit, shoulder clearance and backup-control context.
- Dogs Trust — Harness Training: positive introduction and fit guidance.
- Dogs Trust — Escape Prevention: three-strap harnesses and backup connections.
- Veterinary Record / PubMed — Lafuente et al. 2019: shoulder-extension study.
- PubMed — Effect of Harness Design on Dog Biomechanics: 66-dog gait study and individual variation.
- Health Implications of Dog-Worn Equipment — 2026 review: current review of physical evidence and research limitations.
- Kurgo — Harness Fit Guide: manufacturer-specific overhead fitting and poor-fit signs.
- Pexels — harness cover photo
- Pexels — Dalmatian harness support photo
- Pexels — red harness support photo
- Pexels License
Editorial note: harness instructions vary by manufacturer, so this guide teaches construction logic rather than inventing one universal diagram. The evidence on harness biomechanics is presented cautiously: current studies show gait effects can occur with multiple designs and vary across dogs. Fit should therefore be individualized. Sources were reviewed September 29, 2026.